Guide to Adapting the Seafarer's Application Form (MS Word document)
About the Application Form
The seafarer's application form is designed to streamline the process of submitting personal information and documents by a seafarer to a company. The application form can be partially adapted to meet the client's needs. Once completed by the seafarer, the company can upload the file to the application for the automatic creation of the seafarer's profile.
Editable Elements in the Application Form:
- Drop-down lists of ranks;
- Drop-down lists of nationalities;
- Drop-down lists of countries;
- Certificate names, including:
- Renaming existing certificates;
- Adding new rows to the table (each cell in the row contains a form field; the structure of the new row must match the other rows in the table);
- Deleting rows from the table.
- Drop-down list of vessel types;
- Drop-down list of engine types.
Restrictions:
- New form fields not included in the original template cannot be added, as they will not be recognized by the program.
- Mandatory form fields must not be removed. These fields are specially marked, and their absence may cause errors.
Please ensure that the names of the values in the fields for Rank, Country, Flag, Vessel Type, and Document Names match exactly with the corresponding entries in the database catalogs. Otherwise, the data might be ignored if no match is found in the database.
Instructions for Adapting the Application Form
Step 1: Disabling Editing Protection
Editing protection prevents accidental changes to the document's structure. After editing the template, it is essential to re-enable protection to prevent unintended modifications.
- Open the Word document.
- Navigate to the Review tab.
- Click the Restrict Editing button.
- In the panel on the right, click Stop Protection.
- If the protection was set without a password, it will be disabled automatically.
- After completing all edits, re-enable protection by returning to the Restrict Editing section and following the on-screen instructions.
- You can leave the password field empty when enabling protection, but it is recommended to set a secure password for reliability.
- Always maintain a backup of the template with either protection disabled or a known empty password in case the password is lost.
Step 2: Enabling the Developer Tab
- Go to the File tab and select Options.
- In the window that opens, choose Customize Ribbon.
- In the right-hand section labeled "Main Tabs," check the box for Developer.
- Click OK. The Developer tab will now be available in the toolbar.
Step 3: Modifying Values in the Certificate Table
- Locate the certificate table in the document.
- Add, delete, or modify rows/cells in the table:
- To add a new row: Right-click on the table and select Insert > Rows Below.
- After adding a row, copy form fields from another table row and paste them into the corresponding cells of the new row to maintain a consistent structure.
- To delete a row or a field, first ensure the Content control cannot be deleted option is disabled for the fields.
- To delete a row: Select it, right-click, and choose Delete Rows.
- To modify a cell: Click into it and enter the desired text.
Step 4: Changing Drop-Down List Values
- Go to the Developer tab.
- Select the drop-down list you want to modify.
- Click the Properties button in the Developer tab toolbar.
- In the window that opens, find the Drop-Down List Properties section.
- Perform the desired action:
- Add a new item: Click the Add button and enter the item name.
- Delete an existing item: Select the item from the list and click Remove.
- Modify an existing item: Select it, click Modify, and enter the new value.
- Click OK to save your changes.
Step 5: Editing Text Field Values
- Some text fields may have the Contents cannot be edited option enabled.
- To edit such fields:
- Click the field and go to the Developer tab.
- Open the field properties by clicking the Properties button.
- In the options section, uncheck Contents cannot be edited.
- Make the required changes to the field and re-enable the Contents cannot be edited option if needed.
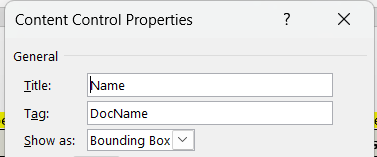
Each field should have correct Title and Tag values. These values are used to identify the field and are essential for the system to recognize the data entered by the user.
Recommendations
- Create a backup copy of the original document before making any edits to prevent data loss.
- Test the document after making changes to ensure all elements function correctly.
How to upload the Application Form
- Open the Seafarers module.
- In right context menu, select Import CV.
- Select the file and click Upload.